My mac had turned into a bit of a mess. I had ssh private keys (that use Passphrases of course!) in a variety of places and I wasn’t very happy about it.
I have several different servers that I connect to. There are a few GitHub systems, a Linux system, and of course several z/OS systems. For each z/OS system, I have a few different accounts: one for software installation, one for system management, and one for coding. I also manage some of these systems through software on other platforms, for example Red Hat OpenShift servers or IBM Cloud servers.
I wanted a solution to help manage these many credentials while also following the best industry practices for sensitive data storage and organization.
I tried LastPass and was able to make some progress with the CLI and the built-in ssh support they provide. I wrote a few scripts for creating keys in LastPass and adding them to the ssh agent. It was ok. I tried 1Password and was initially disappointed, but then noticed their 1Password 8 beta, with ssh key management in it, and no need for scripts.
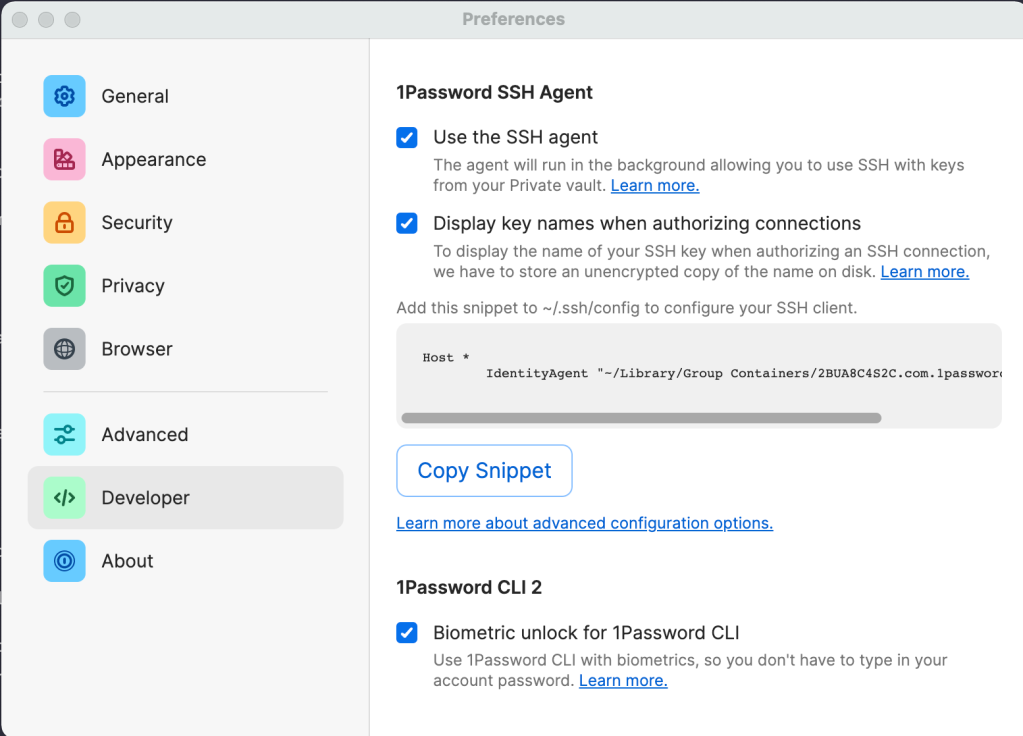
After installing 1Password 8 beta and launching it, I turned on the 1Password SSH Agent, under Developer preferences:

Since my Mac has biometric support with it’s Mac Touch ID, I set that up too.
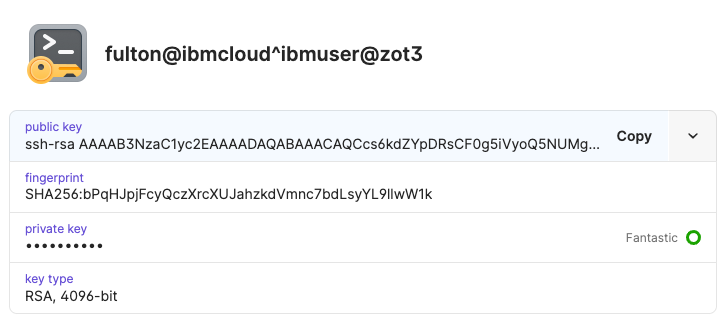
I let 1password generate new private keys for me. I used a simple naming convention for my keys. In the example below, the client is fulton@ibmcloud and the server is ibmuser@zot3. Don’t worry – it is just an example – I haven’t leaked any keys in this article.

After I created the key pair, I retrieved the public key for copying into target systems like GitHub. 1password has browser plugins for this which are a nice alternative.

I repeated the process for all my keys. This was a good opportunity to replace my old keys. If you want, you can import an existing private key with a passphrase instead of generating a new key. If you import an existing key with a passphrase, it decrypts it and just stores the private key without the passphrase. Since the private key doesn’t end up on disk at any time, this seems reasonable.
1Password provides an SSH authentication agent when you install the software. This is slightly different on Linux, but on my Mac, I needed to:
export SSH_AUTH_SOCK=agent.sock
where agent.sock is the location of the 1Password authentication agent on my Mac. In my case, this was:
export SSH_AUTH_SOCK=/Users/fultonm@ca.ibm.com/Library/Group\ Containers/2BUA8C4S2C.com.1password/t/agent.sock
I added the export to my ~/.zshrc so that it would always be available.
At this point, I thought I was done. I was able to connect to my systems and I just had to put my finger on my Mac Touch ID to connect:

Then I discovered that if I had more than 6 entries in my agent, I hit the dreaded Too many authentication failures error. What to do?
The 1Password documentation described how to change my configuration so that ssh can intelligently determine which public key to use for a given host, rather than cycling through all of them. But if you have multiple userids on one server, you will not be able to use a simple Host and server entry as described. A StackOverflow entry shows how to set up aliases for each of my connections, and by melding this information together, I came up with something that worked well for me. For each userid on a server, I create an alias as follows:
Host <user>_<server>
  Hostname <server>
  IdentityFile <public key file>
  User <user>
  IdentitiesOnly yes
So for my ibmuser id on the zot1 z/OS server, I put my public key into ~/.ssh/ibmuser@zot1.pub file, and created the following entry:
Host ibmuser_zot1
  Hostname zot1
  IdentityFile ~/.ssh/ibmuser@zot1.pub
  User ibmuser
  IdentitiesOnly yes
Note that private keys are not specified here – just public keys. With the host entries set up in the config file, the 1Password identity agent is able to determine the right corresponding private key to use without having to cycle through them trying to connect. This also speeds up the ssh connection. A nice bonus.
Ideally, it would be nice not to have my public keys in my file system either. It’s one more thing to keep track of, but I haven’t figured out how to do that yet (if someone knows, please reach out!)
Now, I can connect to all my different userids on all my different servers and use my fingerprint. Secure. Easy. Fast. What’s not to love.
Originally published at Make Developers Lives Better.


0 Comments